
Here are some pictures of our house in Brooklyn New York. We had to do some work on it, and this is a page where I thought I would provide the "works in progress" from beginning to end, if you would like to take a peek.

 |
| We have just hung up mailboxes. |
The entrance is a classic townhouse style, with stoops leading up to the main door. I read that this was to keep the horse manure, pig slops, and various garbage, both liquid and solid, out of the house. New York City was a dirty, dirty place! There is a (now sealed) coal chute, which opened from the street and tunneled underground into the basement of the house, used for coal deliveries back in the day. There used to be an outhouse in the backyard. Discovering these bits of trivia and historical elements has been so enlightening and fun. It boggles my mind that this structure has been here for well over 150 years.
While digging through the backyard and clearing the debris, Michael grimly reported to me that he found some bones - big bones...which likely belonged to a dog (we hope).
One of the challenges of renovating in a brownstone of this nature is that there is simply no way of ingress or egress except through the house. That means every single piece of material in the backyard or house, whether it be supply coming in or garbage going out, has to be carried in and out through the house, up and down stairs. Yikes.
There is a stump in the front yard that we haven't quite figured out what to do with yet. Also, since this picture has been taken, one of the garbage cans had been stolen (!) We planted the matching whiskey barrel planters with one azalea bush each.

The Backyard
Let's start from the back, shall we? This is a view of the back of the house, pre-renovation. The house actually has five levels, consisting of a basement, a garden floor (with sliding glass doors), a parlor floor (with sliding glass doors that open out onto a metal balcony), a third floor with a balcony, and a fourth floor with a slightly smaller balcony. It doesn't look that high from here, but once I was up on the top balcony, I thought the view was slightly vertigo-inducing.

This is a view out to the backyard from the parlor floor, before any work has been done:

Here is a close-up of the garden floor before any work has been done:


This is a view of the yard after the ground has been leveled, the remaining weeds pulled, the tree stump hauled out, and all of the random junk (bricks, bones, stones, garbage) tossed. Michael had to use a sledgehammer to break up concrete in the yard as well, which no one realized was there because it had been laid eons ago and the weeds had long covered the evidence. It was very hard work. Here, the stone patio has been laid, and Michael and his brother are beginning to lay the foundations of the wood deck:

The amount of stuff that was uncovered... it was like an archaeological dig. Among all of the treasures and trash, a bunch of patio stones and a placement stone (it doesn't look like a gravestone...) of indeterminate age, bearing someone's name, were unearthed.
Here is a look back at the house with the stone patio completed:


The wood deck is slowly taking shape in the back right corner. Leveling the soil itself has to be one of the most underappreciated and backbreaking of tasks.

Putting the finishing touches on the wood deck:


Here, Michael surveying his handiwork:

The stone pavers forming the path had all been dug up from the yard - but those were only the biggest pieces. Here, you can see more of the stones that were dug up, being "stored" under the stairs. What's crazy is that there were still more paving stones that Michael kept unearthing throughout the process! When he began planting the switch grass and the fringe bush, he uncovered yet two more extremely long and heavy pieces of paving stone.


They also filled in the gap between the sliding glass door and the stone patio with concrete.

Here my dad is painting the metal stairwell for the steps leading down to the basement.


Finally, there appear to be some tufts of grass!

We may have never scrutinized the earth with such care and excitement before... Here, some more promising patches a few days later. Significantly more green, right?

And a few weeks later...


And a little over a month after grass seed was put down, we have enough to mow.


The Basement
Moving along to the the interior of the house, let's start with the basement, which is unfinished and needed a lot of work because we wanted to clean it up and also install a washing machine and dryer for the duplex.
Here are the steps leading down to the basement, before my parents attacked it with some elbow grease and care.

And here it is, after.

We weren't planning to do much with the basement, as it is really just a storage space for now, and we plan to leave it unfinished. This is how it looked before, right after we closed:


Here is the water pipe, exposed for purposes of connecting the line for the washer.


Putting the pieces together...


This was after the sink had been attached and the pipes covered.


This is how it looks, after the machines have been delivered and installed.

The basement was pretty raggedy to start, but as Michael started to, and as my parents continued to help clean it, slowly and steadily over the days, slowly the dirt, sand and grime started to lift.


Finally, after everything was swept clean we laid down runners leading from the stairs to the door and then for the walk to the washer/dryer.


The Interior
Because the house is split into three separate units, the stairwells are
common areas and each unit has its own entrance, with its own kitchen,
bathroom, washer and dryer, and its own water meter, gas meter, and
heater. There is a hatch and a pull down ladder that provides access to the roof.


The Third Floor
This is currently configured as a two bedroom, one bath standalone apartment unit with a balcony off the back.


The Fourth Floor
This is pretty much the same exact layout as the floor directly below it.


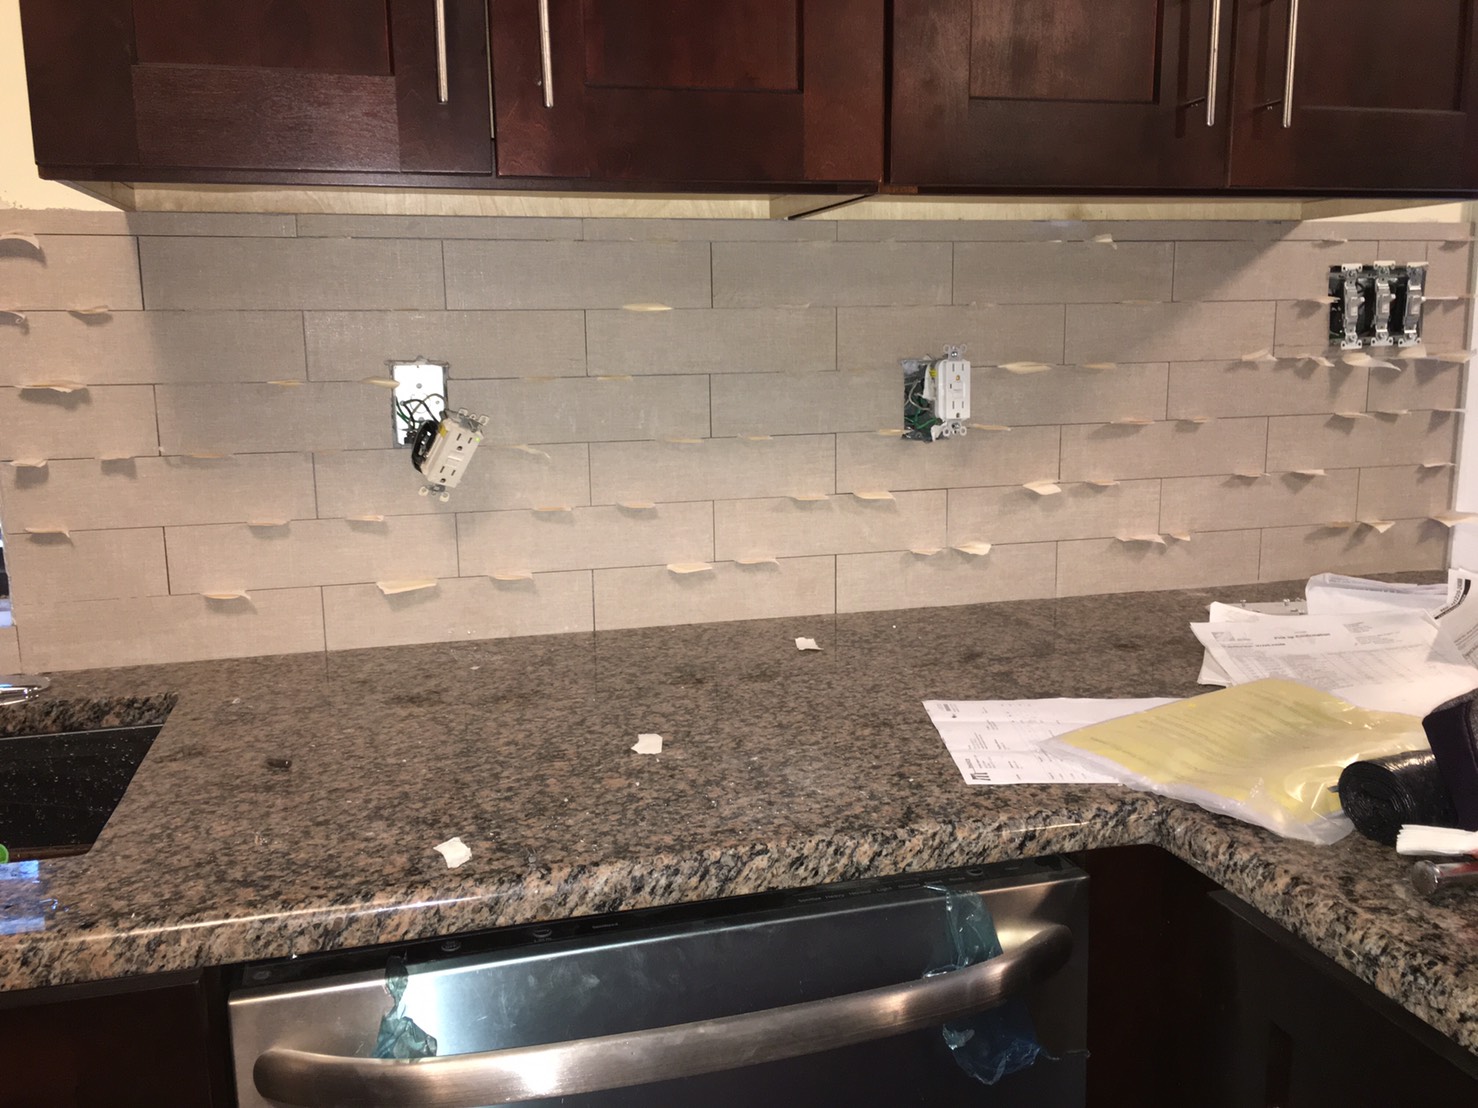
The Lower Duplex
We had a contractor install the tiles to the back of the kitchen wall, and also replace a slab of granite on the windowsill.

